FTL Design
History of Technology
|
FTL Design |
| Edison’s Electric Pen Western Electric Directions |
|||||||||||||||||||
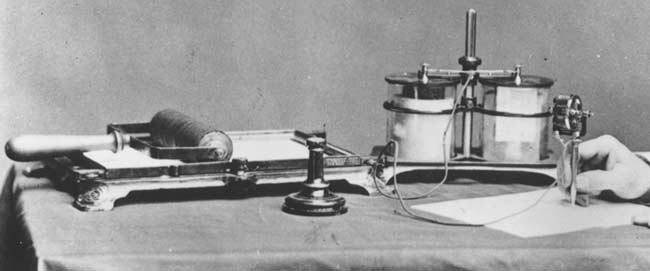
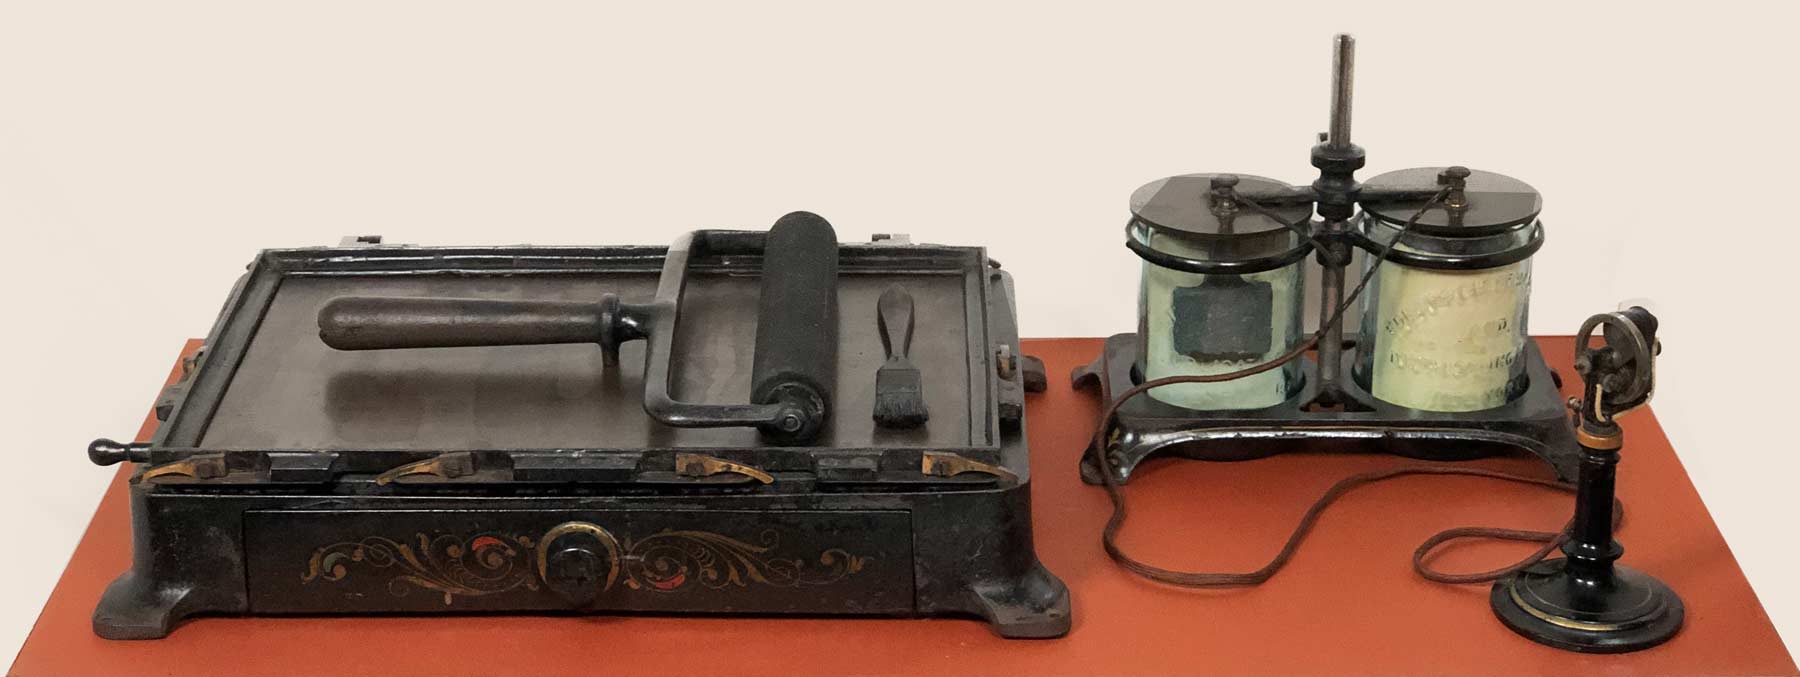
Pen owner Randy B. has very kindly scanned his original Western Electric manual for the electric pen, and the text and figures are reproduced here. The original manual has three small line drawings to illustrate key parts. At appropriate places in the text I have added photographs of the components of a complete No 2 outfit together with descriptive notes. See also these two early price lists for electric pen outfits, supplies, and spare parts, many of which are mentioned in the Directions.
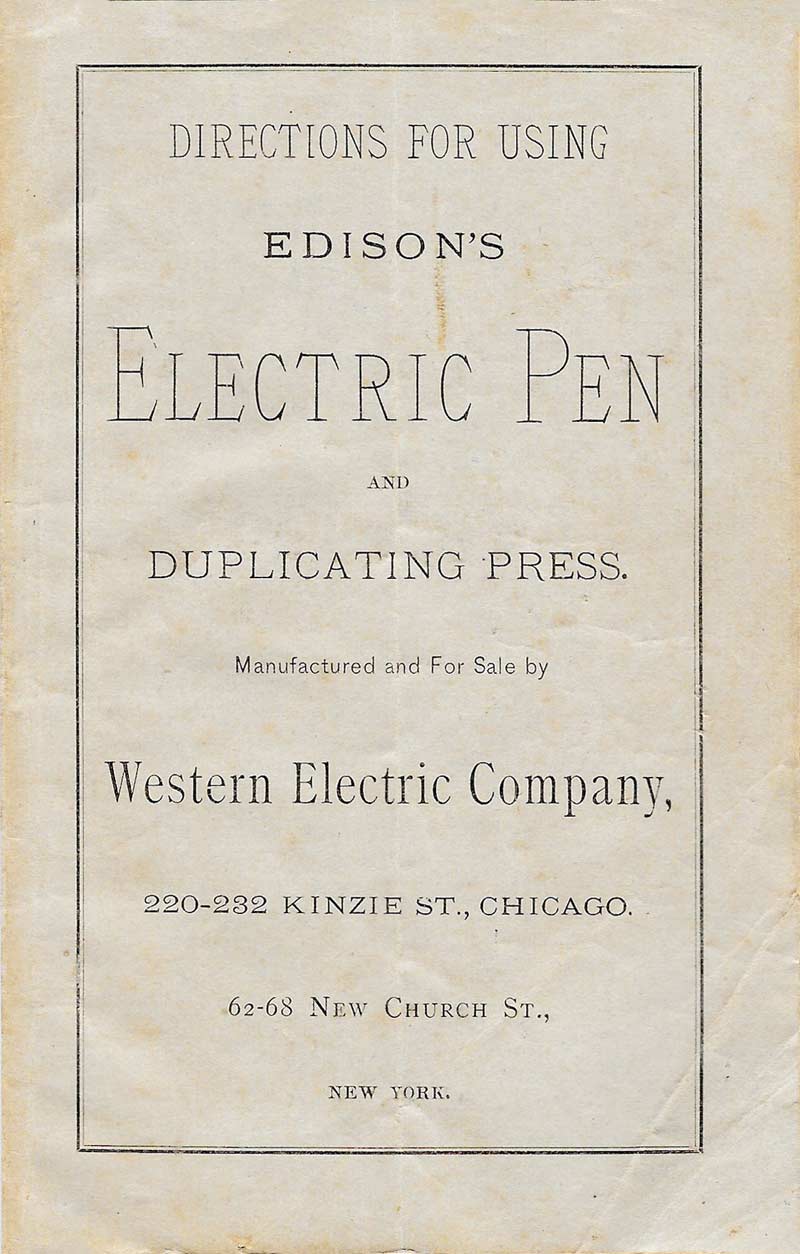
DIRECTIONS For the Setting up and Using of EDISON’S
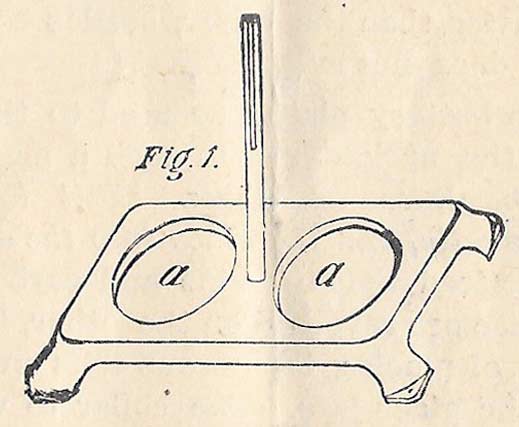
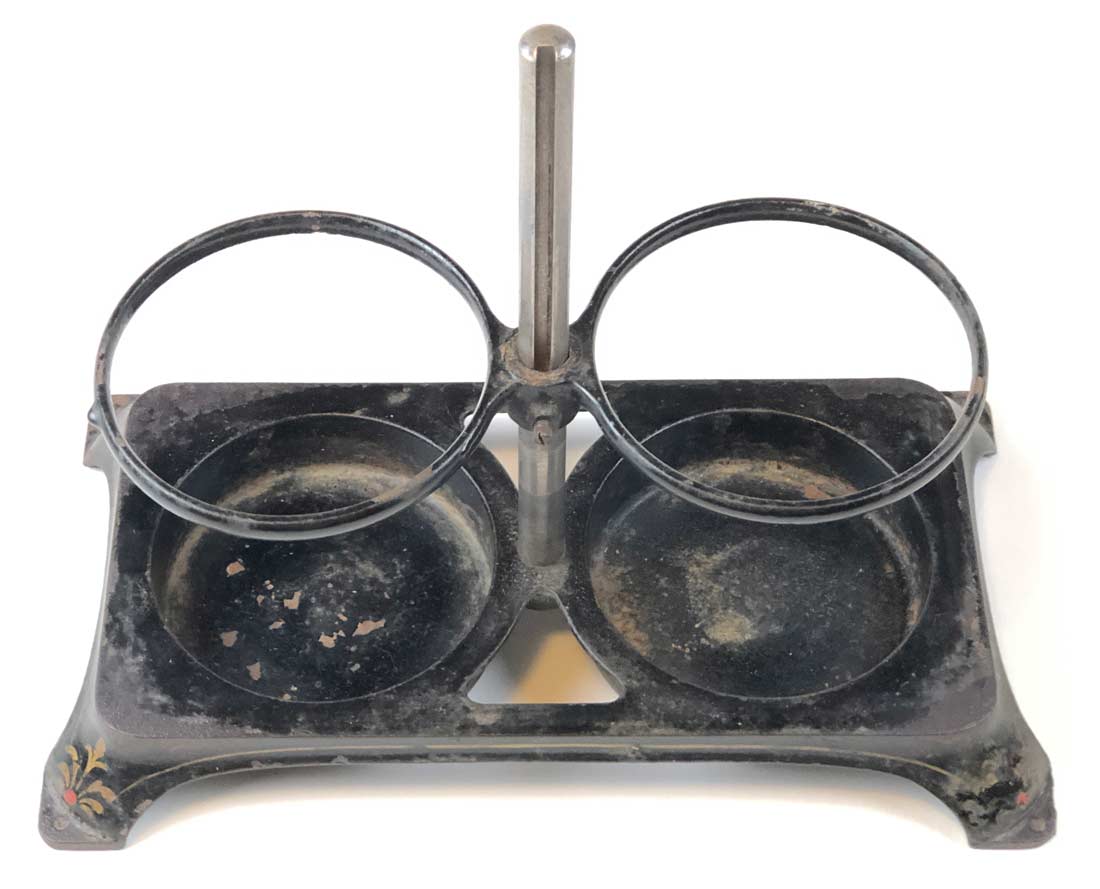
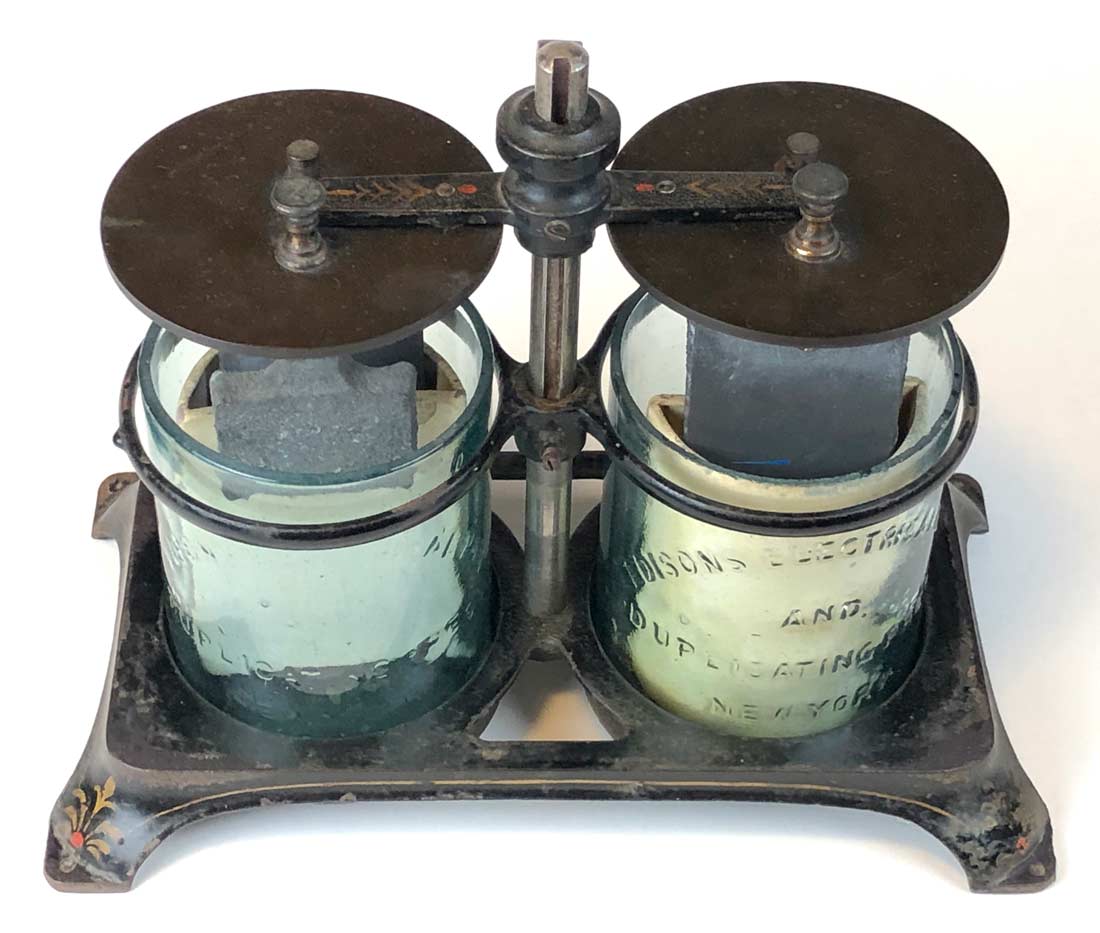
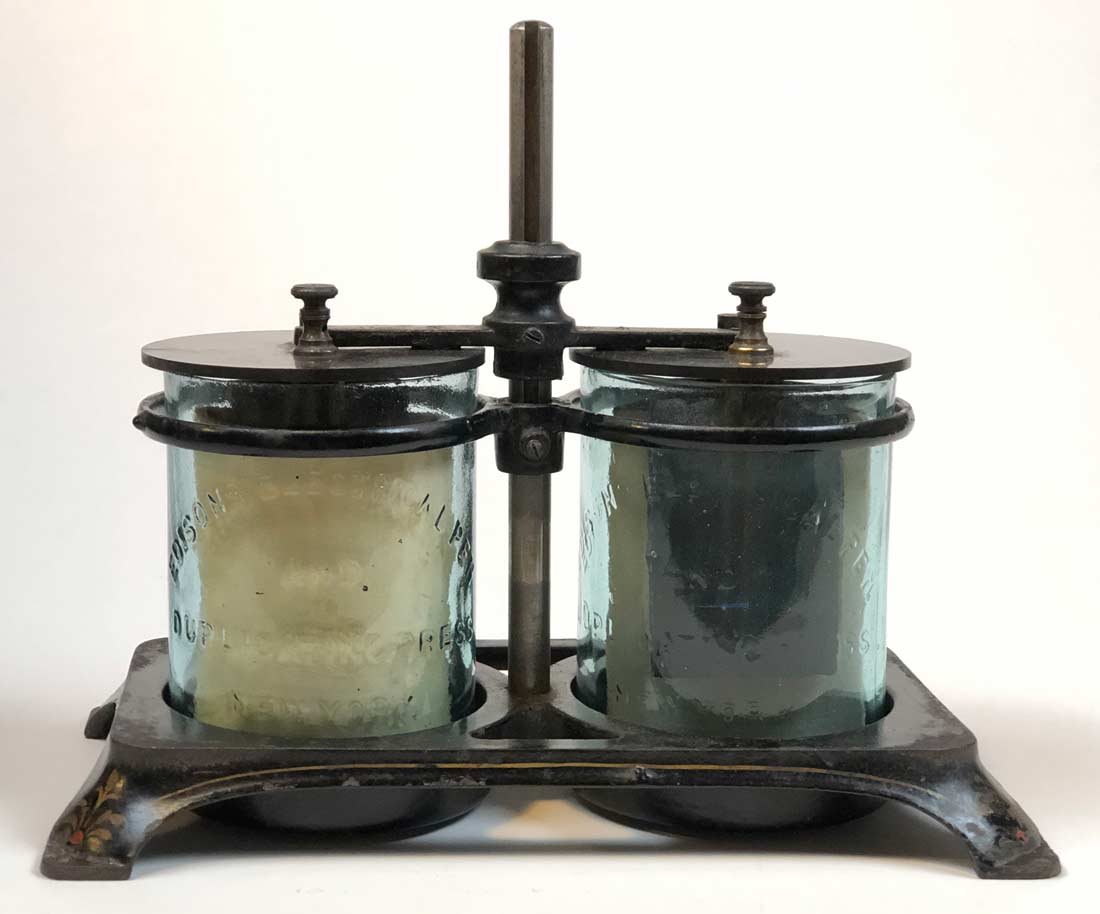
TO SET UP THE BATTERY. Take the nickel plated rod which serves to hold the plates of the battery, and fix it in the base with the long groove directly opposite one of the sides as in Fig. 1.
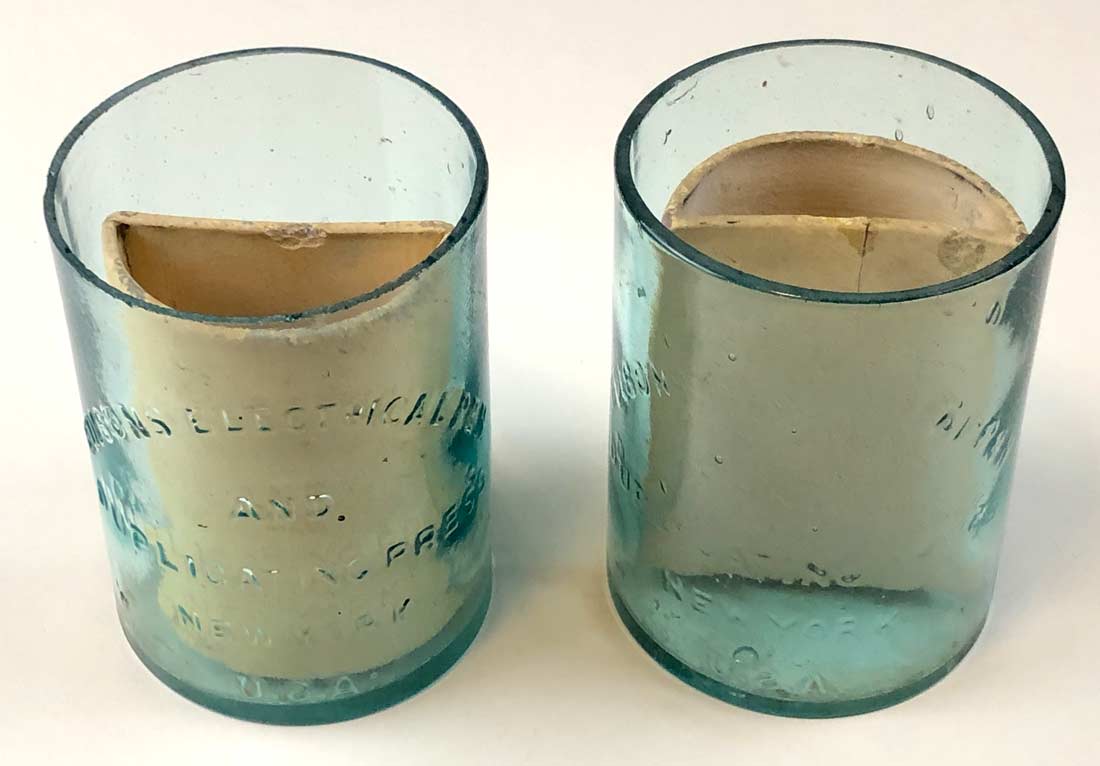
Secured to this rod will be found the screw and washer for fastening it to the base. Place the glass jars in the recesses of the base, a a. Slip the spectacle shaped glass holder on the rod and secure it three inches above the base*.
Place the porous clay cups or cells in the glass jars, one with the flat side turned from you and the other towards you.
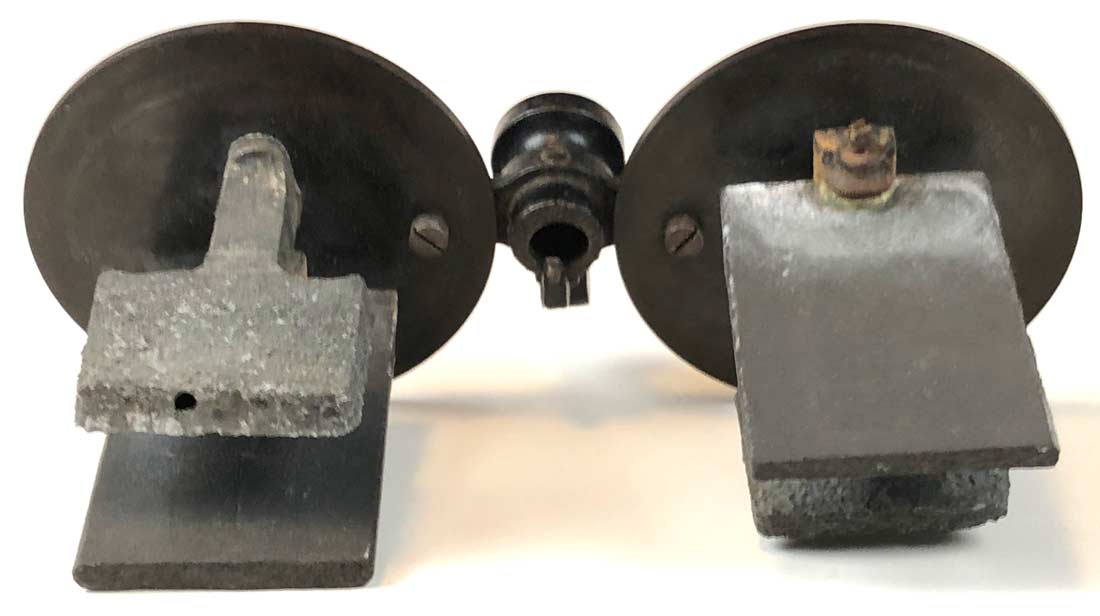
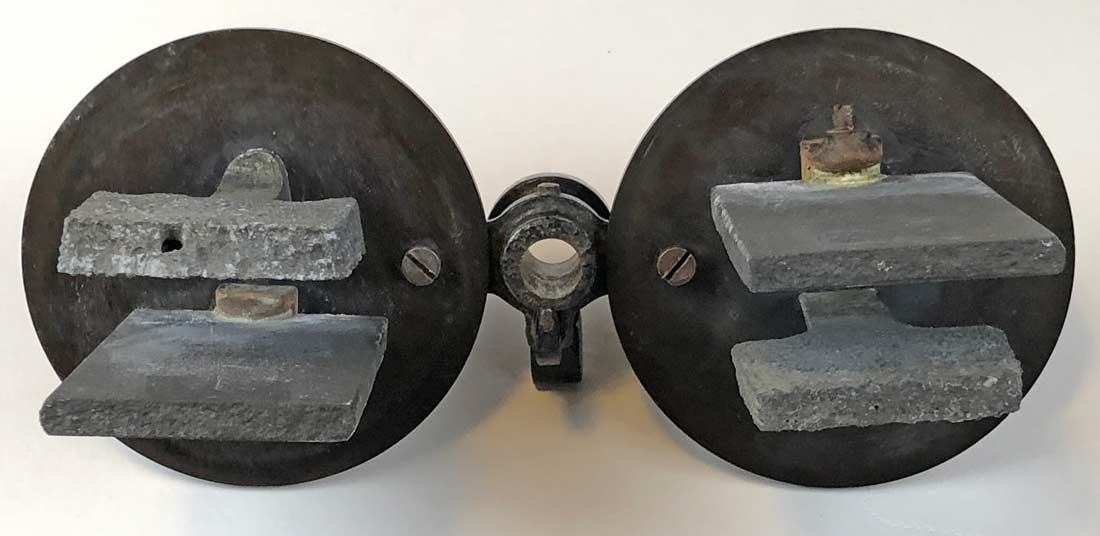
Then attach the zincs and carbons to the rubber discs so that one zinc and one carbon will be secured to the brass posts, and one of each to the iron screws. The brass posts always rest on the rubber discs, the iron screw on the little brass strap.
Fill the porous cups to within three-quarters of an inch from the top with red fluid Fill the glass jars to within three-quarters of an inch of the top of the porous cups with water, into which a tablespoonful of common sulphuric acid is then poured. Move the porous cups backwards and forwards in the glass jar a few times to thoroughly mix the acid and water together. If this is not done the acid, which is much heavier than the water, settles to the bottom and does not mix. Slip the battery plates secured to the rubber discs on the upright rod in such a manner that the black plates of carbon, shall lower into the porous cells, and the zincs into the water. It will be noticed that the zinc and carbon plates on one disc are reversed on the other, hence the necessity of placing the porous cells on opposite sides of the glass jars.
The collar to which the two discs are secured is provided with a screw sliding up and down in the long groove in the rod which prevents the collar from turning round, and with a catch which drops into a notch on the opposite side when the discs are lifted high enough, and holds the plates out of the liquids. If they are allowed to remain down when the pen is not in use, the sulphuric acid and water would soon eat the zincs away. To prevent this, they should always be lifted out after using. When the battery is not in use, and the plates are lifted up, the height of the water should be so regulated that the zincs do not touch it at all. After considerable use, the mercury with which the zincs are amalgamated becomes eaten off, and the action of the acid upon the pure zinc is more intense, causing what is termed “boiling.” This can be obviated by removing the zincs from the discs, washing off all superfluous matter, and allowing them to remain in the acid and water a few moments; then remove and add a few drops of quicksilver to them, which will immediately spread over the surface, making them good as new. By this precaution, zincs will last a long time.
The battery fluid should last from one to two weeks, according to the amount of work it has to perform. When it is in daily use, for an hour or so at a time, it is recommended that it be changed once a week. Operators will have to be guided by experience. If you dip a strip of paper in the red fluid when the battery is first put up, it will take a deep orange color; after being in use some time, this will disappear, and when it is entirely gone, the battery has not strength enough to run the pen, and should be renewed. If the battery is not strong enough, the pen will slow down as soon as you begin to write, when the old fluids should be poured out and the battery recharged. The water in the glass jars should be renewed frequently, and the “black powder” that collects on the zincs should be removed with a stiff brush. [Editor's note; The battery is described in other literature as consisting of two Bunsen cells. Each cell produces about 1.9 volts, and the two cells are connected in series, providing 3.8V to the electric pen. The German chemist Robert Bunsen invented this zinc-carbon battery in 1841 as an cheaper alternative to the zinc-platinum Grove cell.]
RED FLUID. Procure a common jug or earthen crock of one and one-half gallons capacity. Pour into this about one gallon of water, (hot if possible,) put in one pound of powdered Bichromate of Potash, and allow it to dissolve, shaking the liquid frequently. After it is dissolved, pour slowly into the jug three pounds of sulphuric acid, and allow it to stand one hour, shaking occasionally. It is then ready for use. This quantity of fluid will charge the battery about twenty times, and if renewed once a week will last five months, costing ten cents a month. Wholesale Druggists charge 25 cents per pound for bichromate of potash, retail druggists 60 cents; it is advisable to purchase from the former several pounds at a time. Common sulphuric acid can be bought in three pound bottles, and should not cost more than eight cents per pound. A common tablespoon should be procured to measure the quantity of acid put in the glass jars. In renewing the battery, always do it at a sink where there is plenty of water running all the time to wash the acid away. It is not desirable for ordinary uses to make the amount of fluid the above receipt calls for; one-half or one-quarter the quantity is better, as you have the advantage of fresh fluid.
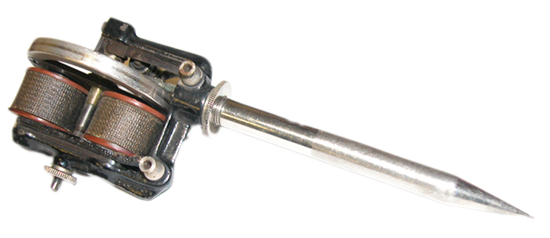
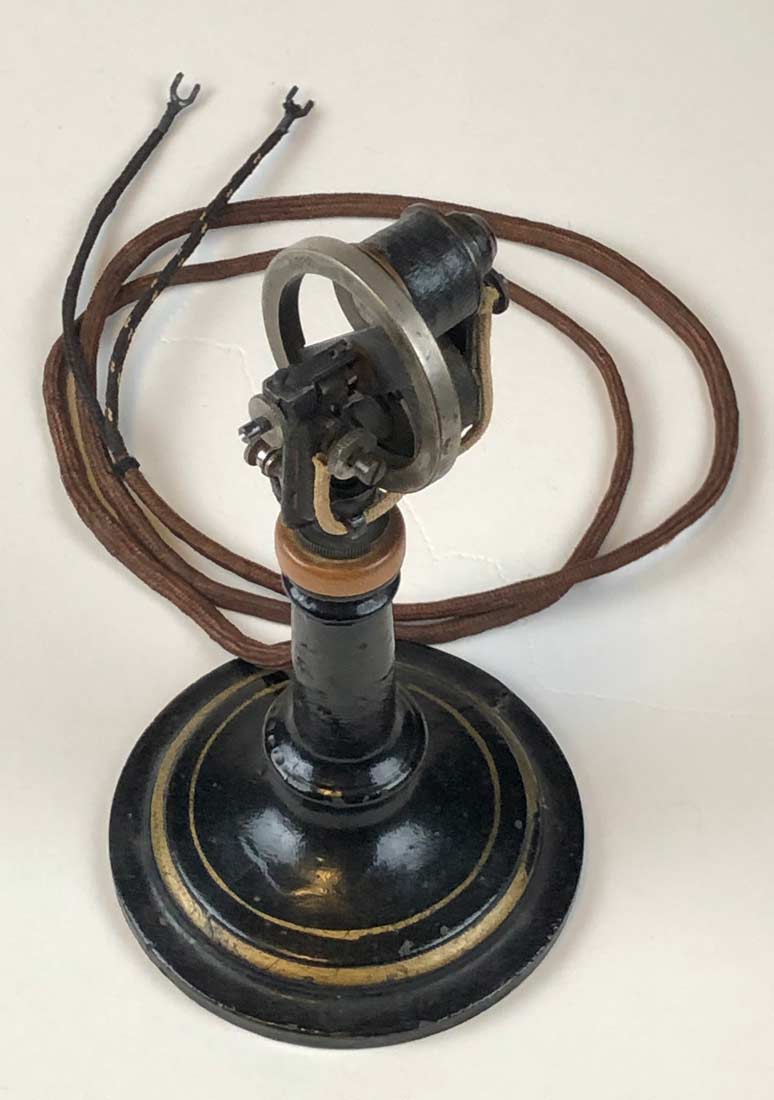
THE PEN. The pen consists of a needle made to move rapidly up and down by means of a cam on the revolving shaft of a small magnetic engine, and is used to perforate the paper. Upon one side of the iron frame will be noticed two nickeled posts, into which the two smaller plates on the end of the flexible cord are to be clamped (the other end of the wire being fastened to two similar larger posts on the battery).
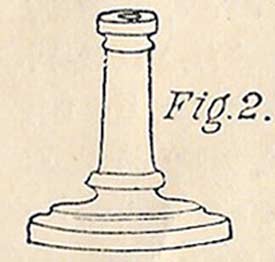
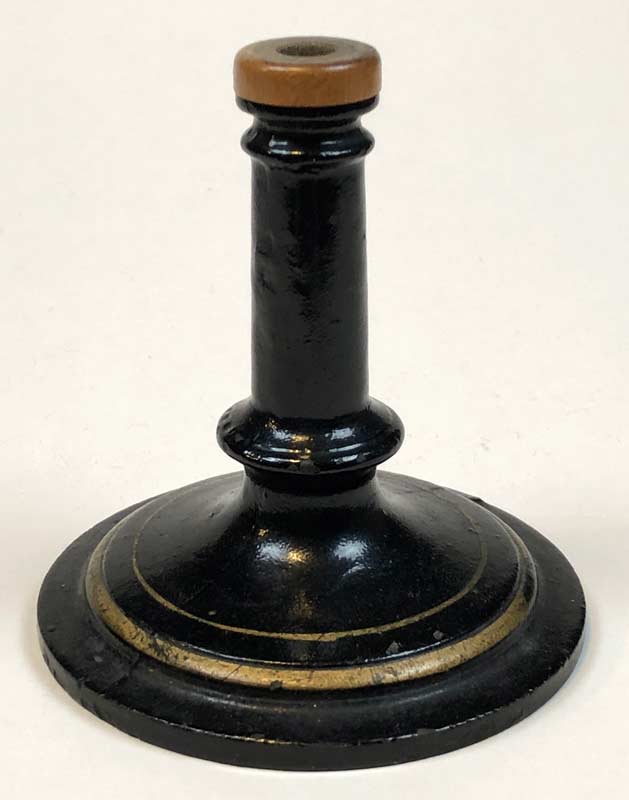
A stand (Fig. 2) to hold the pen when not in use is furnished. Care should be taken when inserting the point of the pen in the stand not to touch the wood top of the stand, as it might damage the needle. In case this occurs, or the point becomes dull from long use, a new shank can be supplied from this office by mail (see price list), or a jeweler can replace it in a few moments. The needle used is known as “Sharp’s No. 7.”
The needle can be sharpened if it becomes dull or rough from usage or accident. Remove the tube or handle by loosening the set-nut at top of tube and unscrewing the handle from the frame. Then remove the guide to the upper part of the shank which is screwed to the pen frame, and slip the needle off the shaft, when you can either sharpen it with an oil stone, or replace it with a new one by heating the brass wire and removing the old needle. It is of the utmost importance that the needle should be kept sharp.
WRITING. The paper used for stencils is known as Crane’s Bank Folio, a sample of which accompanies each apparatus. Good foolscap from eight to ten lbs. in weight to the ream will answer, but it is not advisable to use any over ten lbs. When writing, place your stencil paper on a piece of firm, hard blotting paper, as near like sample sent as possible. Soft, spongy blotter does not answer as well, as the point of the holder is apt to push through the stencil. Let blotter rest on table or desk, without cloth cover if convenient. In writing, hold the pen upright, give it a firm, even, steady pressure, the same on every portion of the letter. Make no rapid or light motions, especially in up strokes, as is apt to be the case at first. In crossing “t’s” or in making the lower part of “g’s” or “p’s,” use the same steady, even motion and pressure. Do not write too slowly or hold the pen with too firm a pressure, but try to write naturally; all this will be attained by a very little practice. When the pen is held slanting, it neither punctures nor prints as well. Always leave a margin on each side of stencil sheet, and write within the margin lines as indicated in sample paper sent, otherwise the frame will cover it up and the impression cannot be taken. For postal cards and all small matter, write within a space a trifle smaller than the card or matter to be prepared and register in same manner. Hold the stencil up to the light occasionally when writing and see if the perforations are clear, regular and distinct as they should be. After writing, replace the pen in the stand and raise the battery plates out of the fluids. If an error in writing is made, turn the paper wrong side up on a hard surface, and rub down the projecting edges with a smooth knife handle. Then apply a little shellac; when this dries you can write over the place again without danger of its breaking through. By the use of carbon paper (see price list) under the stencil while writing, the lines will appear in black, and a proof be immediately available. By oiling the stencil and using a blue blotter, the work can be seen as it progresses.
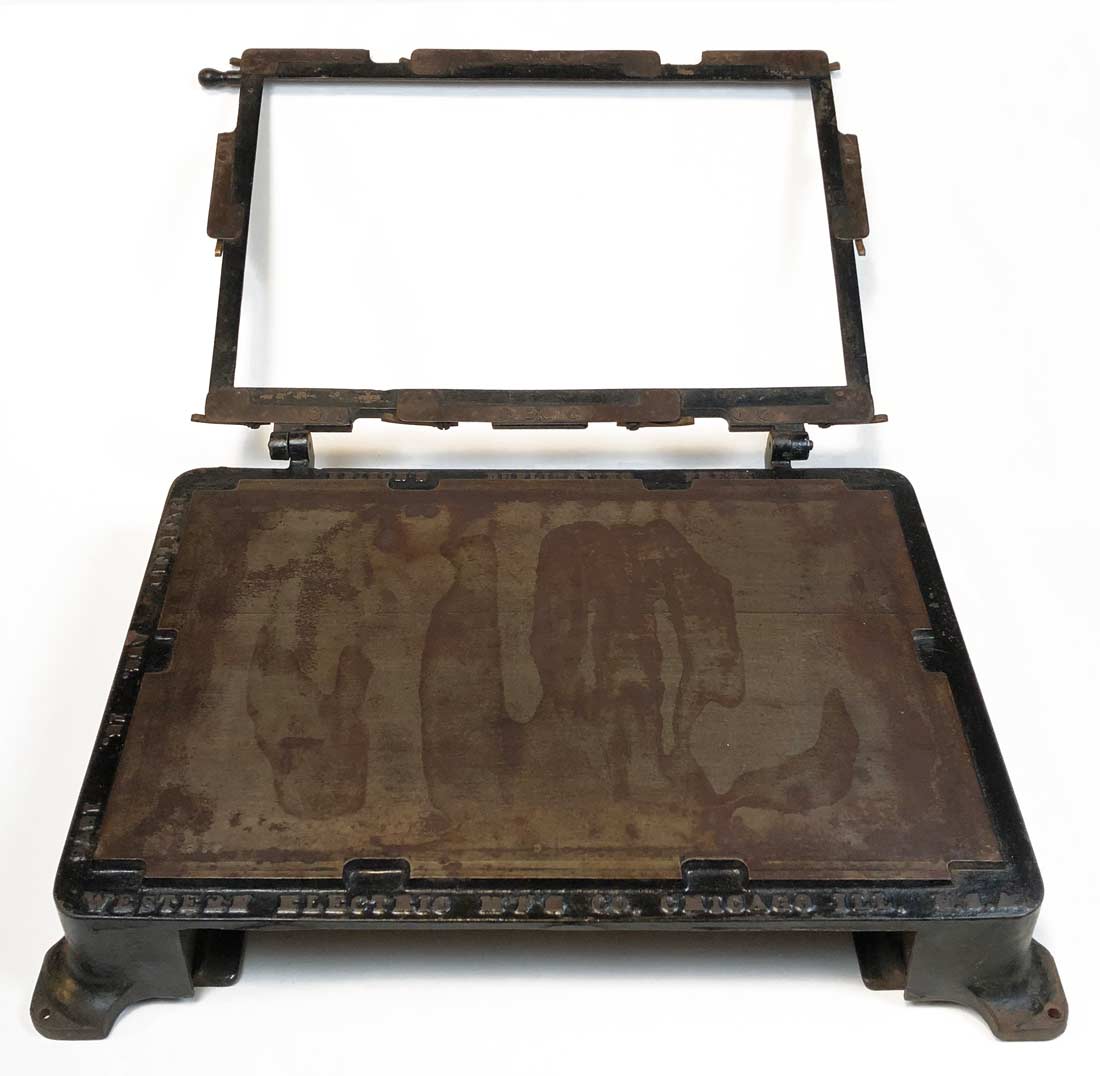
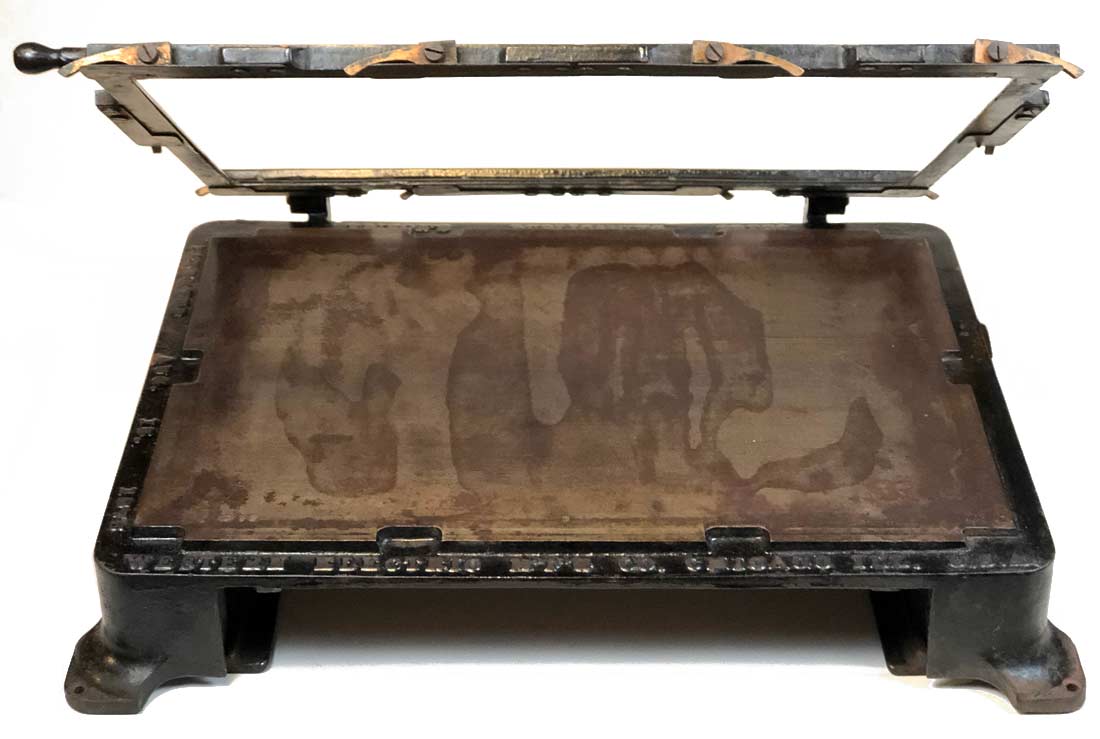
THE PRESS. Raise the frame off the press and lay it back; turn the brass levers under the clamping springs in such a position that they raise the springs from the frame. Paste little patches of paper on each corner of the stencil sheet, and wherever the clamp-springs take hold, to give additional strength to the paper, then place the stencil underneath the springs, and lower the right upper spring; moisten the thumb or finger a trifle and stretch tightly toward the left upper spring, and lower that. Then, with both hands, stretch the stencil from both upper ends at same time, and lower the springs, or you can stretch it one end at a time; then lower side springs, merely making stencil taut. Much care should be exercised in securing the stencil firmly and without wrinkles.
When a large number of impressions are to be taken, it will facilitate the printing to paste the stencil to the frame with good mucilage, and stretch it firmly and evenly with the thumbs until nearly dry, when it will be as tight as a drum-head, and admit of very rapid rolling. It will be necessary to scrape or file off the Japan covering on inside of frame, and expose the iron, as the gum will not adhere to the Japan. Do not paste the stencil on until the proof impression has been taken. When the stencil is securely fastened it is ready for taking impressions.
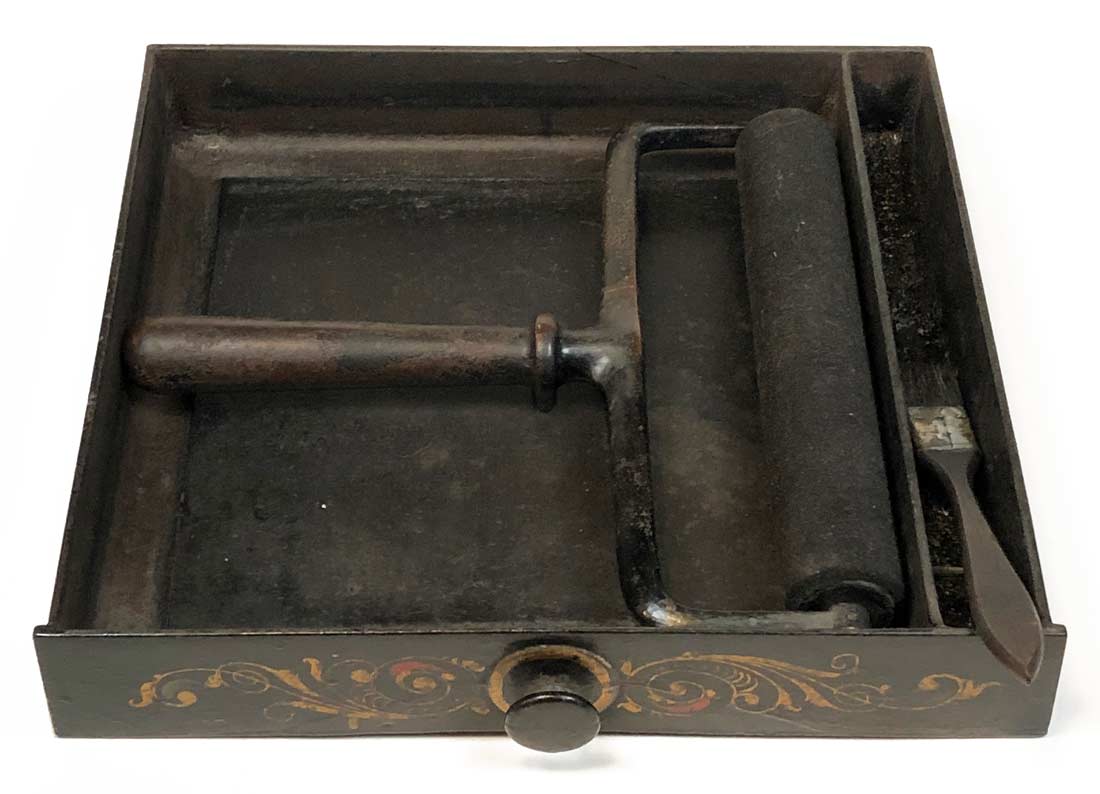
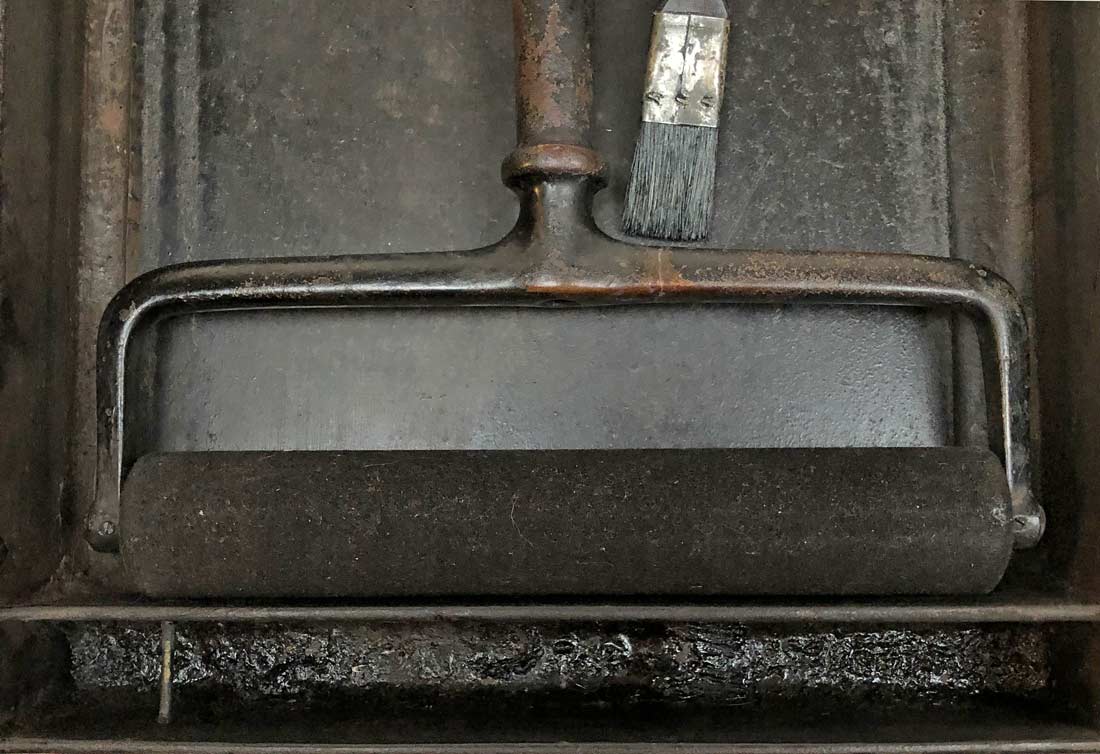
TO INK THE ROLLER. Pour into the distributing drawer about a teaspoonful of ink. Distribute the ink evenly over the bottom of the drawer with the brush. Then take the roller and thoroughly distribute the ink over it by rolling it forward and back. It is not necessary to ink the roller every time impressions are taken from a new stencil, as, after a little use, it becomes saturated with ink, and the ink distributed on the stencil with the brush as directed below is sufficient. New rollers though thoroughly inked before shipment, will at first require more frequent inking, but it is advisable to use but little ink at a time—say a teaspoonful. A bottle of ink, if properly used, should last for at least 100,000 or more impressions.
IMPRESSIONS. Place upon the bed plate of the press a sheet of thin blotting paper, similar to sample sent; close the frame; with the little varnish brush distribute the ink over the stencil until the perforations are completely filled. Then take roller and without inking it, place it on the stencil and move it backwards and forwards for a few moments, until the ink is thoroughly through the perforations. Use considerable pressure upon roller at first; then lift the frame, and if the impression is perfect you are ready to commence printing. Should the first or proof impressions be blotted by the use of too much ink, use the blotter again until all the superfluous ink is taken up. When ready for work, paste or fasten a blank sheet of thin paper on the base of press and make an impression on it. This will be the guide or register for placing all succeeding ones in exactly same place. Impressions can be made dark or light as required, by pressure of roller. The best copies are obtained by using a small quantity of ink, and having it well and evenly distributed on the roller.
Book paper has been found the best to print on, as it absorbs ink quickly and dries almost instantly; on highly sized or glazed paper the ink requires more time to dry. The great fault of many is the use of too much ink—a little observation and practice will regulate this. Should the roller at a any time get impregnated with too much ink, soak it over night in benzine, and roll it thoroughly on a piece of blotter. Do not use any pad on base of press when printing, only a thin sheet of paper for your register.
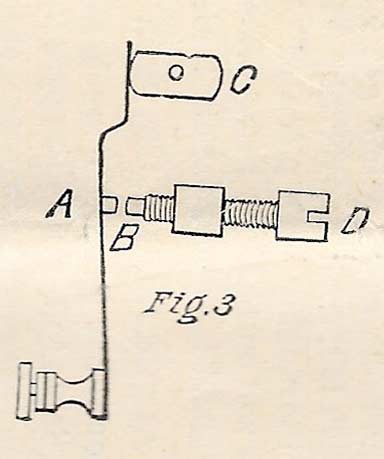
ADJUSTMENT OF PEN. It is obvious that any such mechanism as this pen will be liable to certain disorders in the hands of inexperienced persons; in most cases they are brought about by carelessness and inattention to these instructions. It would be well to note the following points in regard to the general working of the apparatus. The needle should protrude from the tube just enough to puncture the paper. There is a thumb nut on the tube which holds it fast in position; if the needle does not protrude far enough, take the pen in the left hand and with the right loosen the nut and turn the tube round from you a little and screw up the nut; if it protrudes too far turn the tube towards you; a little practice will soon make you proficient in this. The wires connecting the battery with the pen, occasionally break, and prevent the passage of the electricity from the battery to the pen. This break may occur inside the covering where it is difficult to find. When mending these breaks, always twist the bare wires together. The two platina points become dirty owing to an oxide forming by the frequent occurrence of the spark. This must be removed by placing the file sent with the apparatus between the points A and B in Fig. 3, and cleaning off.
This will not occur until after long use. A small screw driver is sent to adjust the screw D and the center screws. The screw D should be so adjusted that there is only the thickness of a piece of paper between the contact points; when the cam C is in the position shown in Fig. 3, the points A and B should be very much closer together than shown in the cut; if they are further apart the engine may slow down after commencing to write. A small bottle of watch oil is furnished. Insert a wire in the cork, the end of which is always in the oil. Oil the points of the revolving shaft, the cam C and the square top of the bar carrying the needle, about once each week. Be sure in oiling the pen that no oil gets between the platina points, and if it does, put a piece of paper between these to soak it up moving it backwards and forwards until clean. After cleaning, separate the points and blow between them to prevent any fuz from the paper sticking to them. By long use the point of the tube from which the needle protrudes becomes worn. A new one can be procured from this office. To ascertain if the needle is puncturing properly, hold the stencil up to the light. The zincs of the batteries should be replaced by new ones when they are very much worn. Oil the bearings of the ink roller occasionally. For further information address WESTERN ELECTRIC COMPANY, NEWYORK: Or,
[this space would have been used to add a retailer's address]
|
|||||||||||||||||||
| Return to Edison’s Electric Pen main page |
Copyright © 2019 FTL Design
Last revised: 2 June, 2021